Foreword: In the Health Sync app I’ve been working on lately (a cycling workout app), I integrated real-time streaming from the DJI Osmo Action 5 Pro. The pipeline looks simple — camera pushes RTMP, server receives the stream, frontend plays it — but actually stringing together “BLE control + RTMP push + server-side auth + local recording” meant stepping on plenty of pitfalls. This post documents the whole implementation as a reference for anyone with the same need.
1. The Overall Pipeline
First, a screenshot of the final result — this is the streaming configuration panel on the “Shared Track” page in Health Sync:
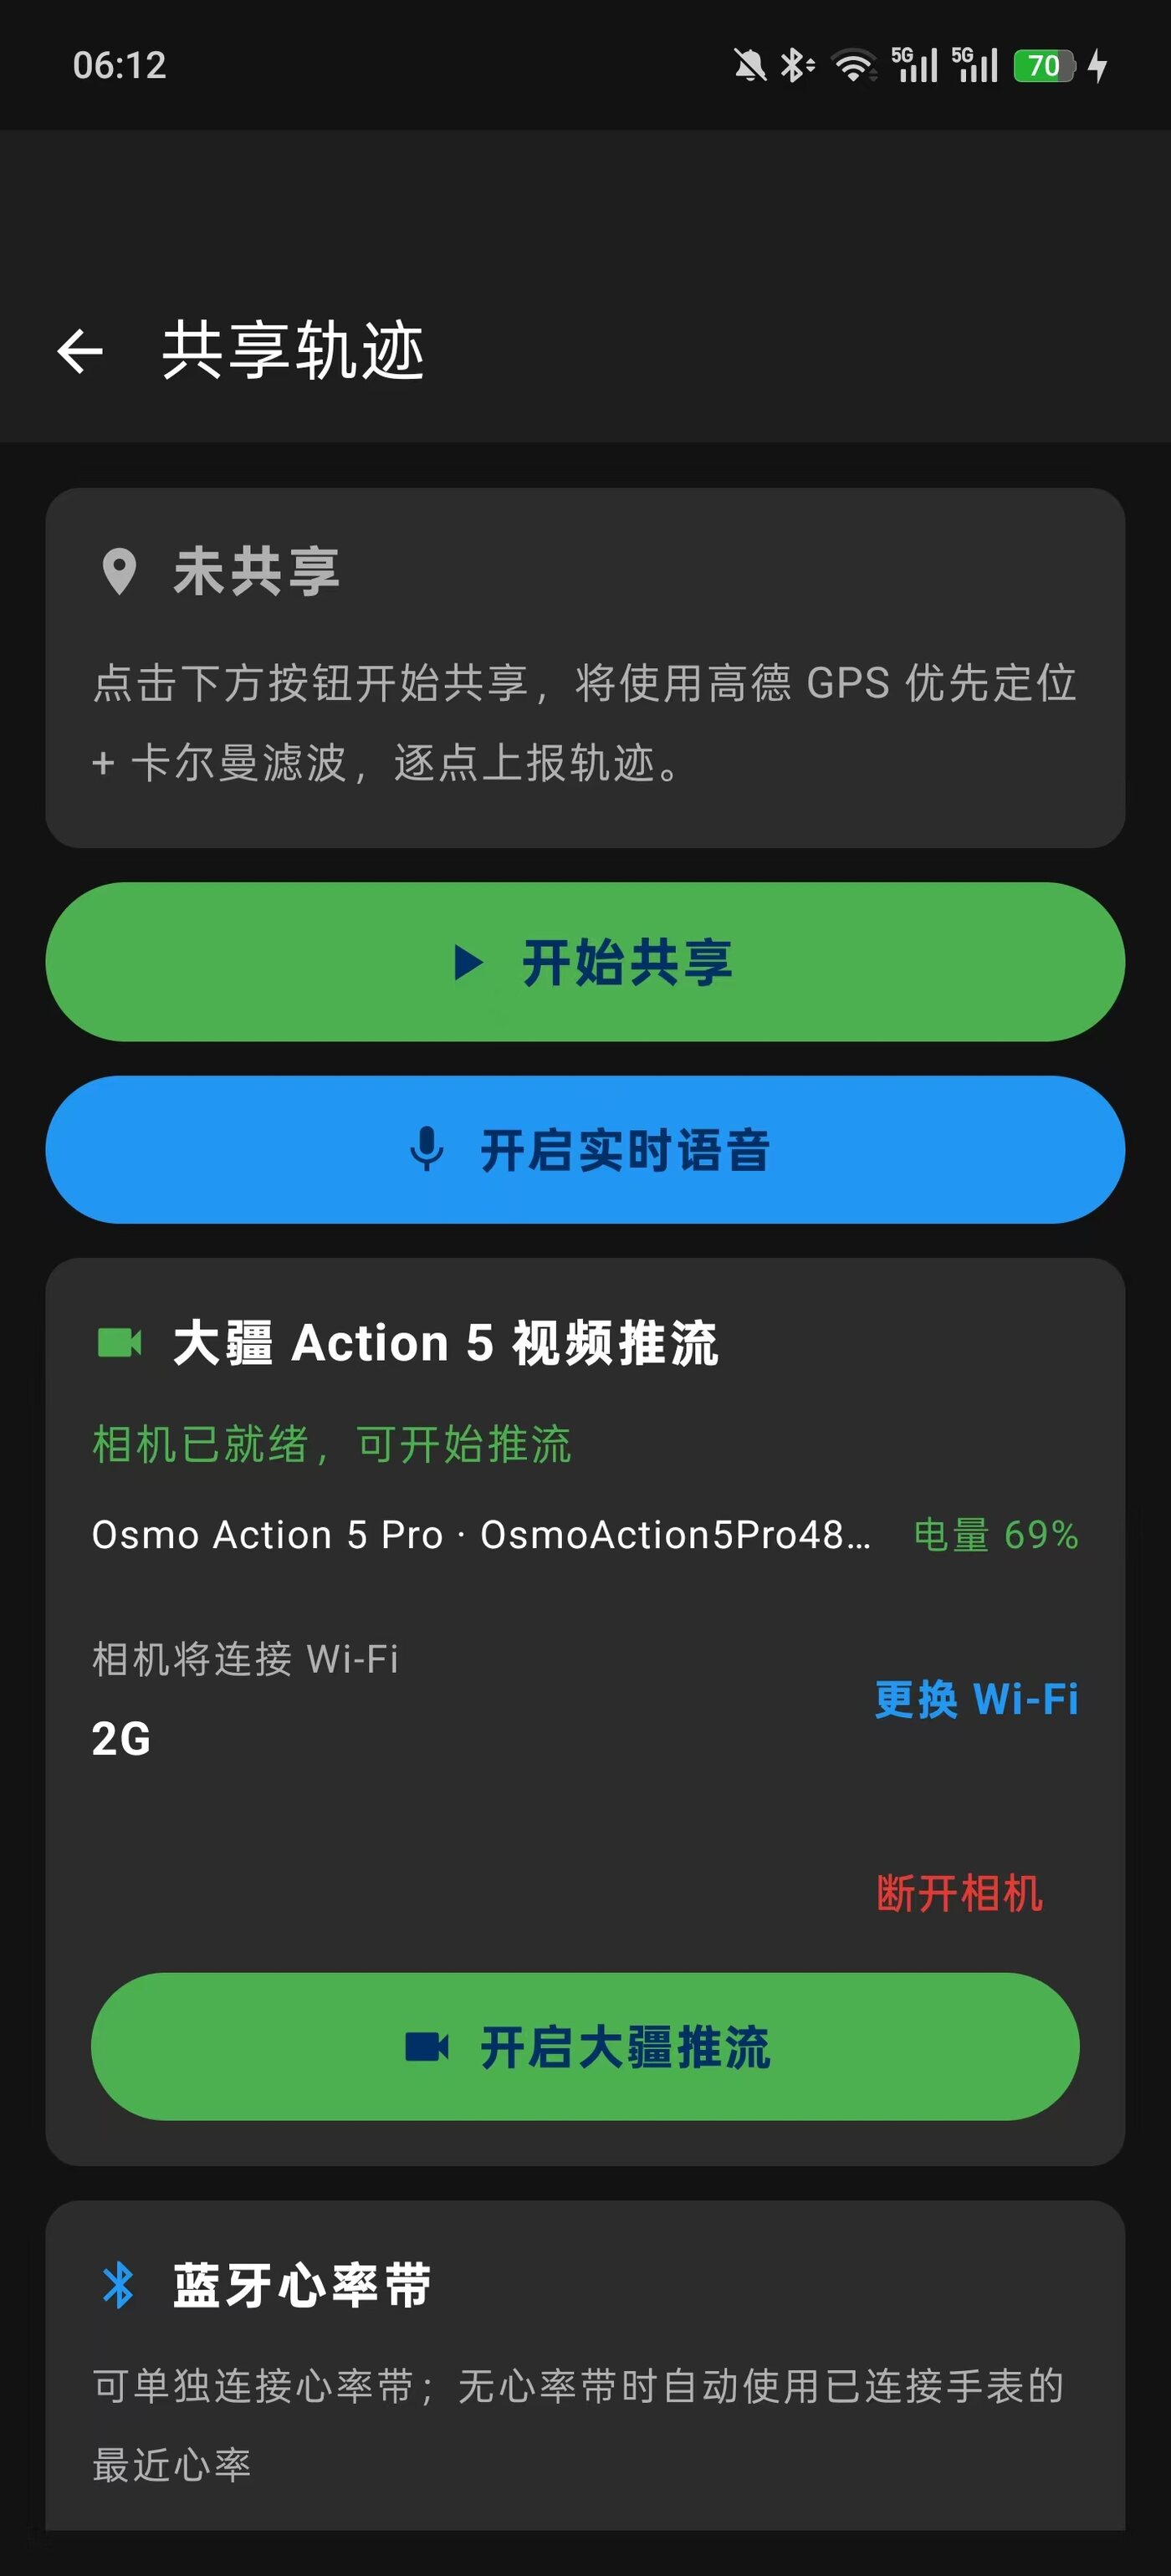
The whole data flow goes like this:
|
Note: the phone here is not a “relay station.” The camera connects to Wi-Fi and pushes the stream directly; the phone only passes the Wi-Fi name, password, and RTMP address to the camera over BLE.
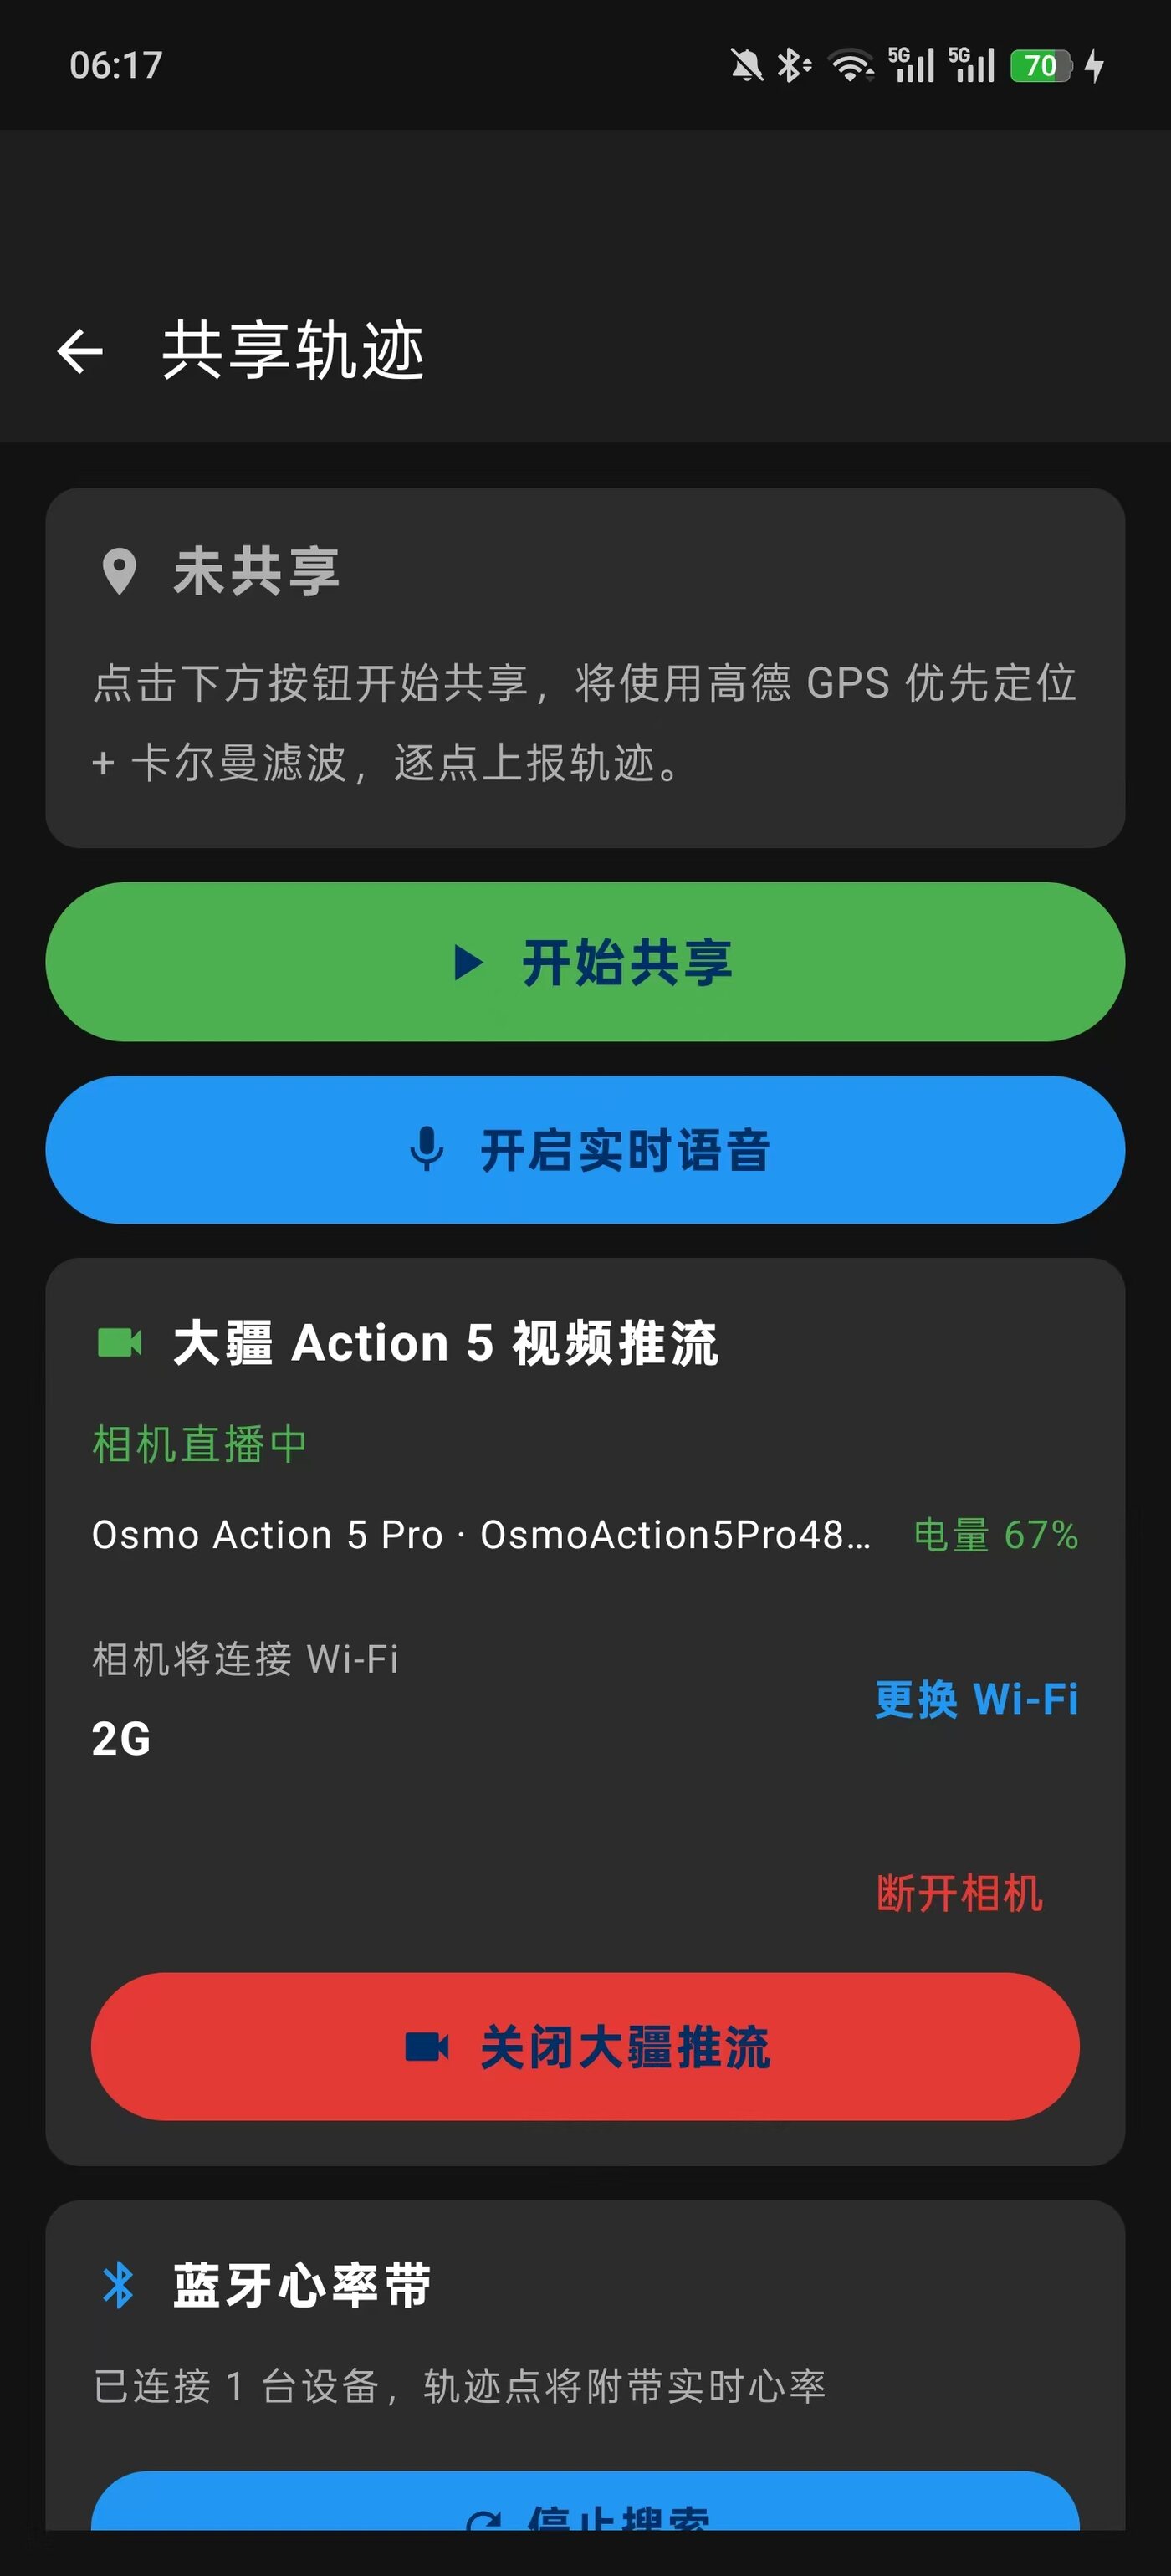
Once the stream is live, the app shows “Camera live”:
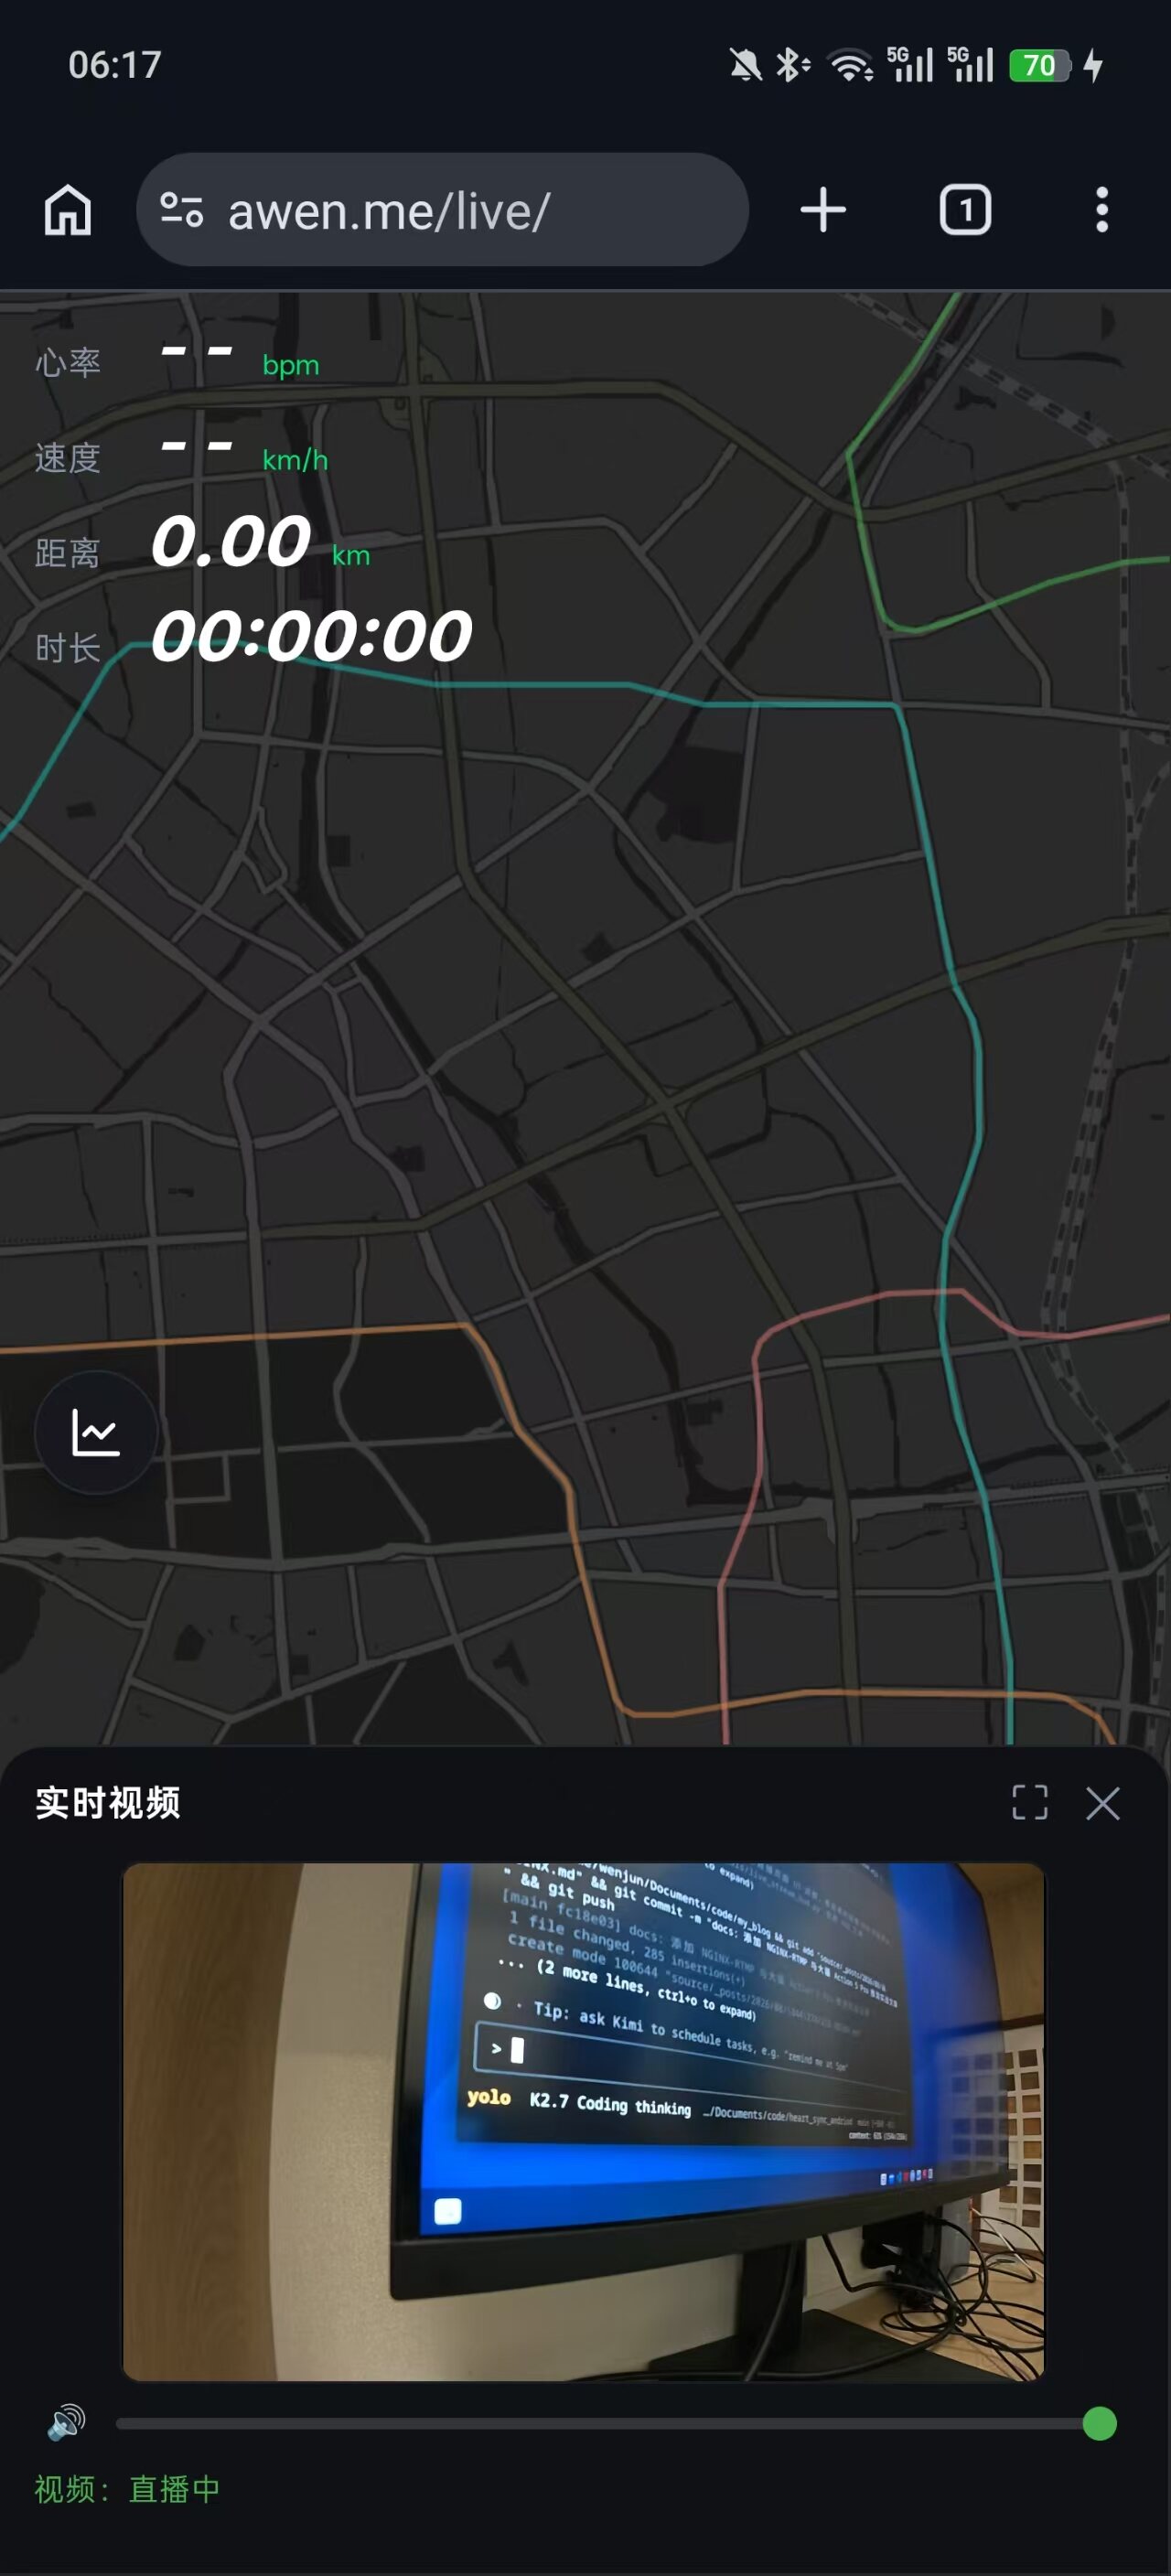
And on the web side you can see the real-time video panel and the map track:
2. Server Side: SRS Receiving the RTMP Push
Although the title says NGINX-RTMP, what I actually use in production is SRS (Simple Realtime Server). The reason is plain: SRS’s DVR recording, exec_publish callbacks, and HTTP auth hooks are all more usable out of the box, and friendlier for a one-person project. If you really want NGINX-RTMP, an equivalent config snippet comes later.
2.1 Core SRS Configuration
|
A few key settings:
listen 1935: the standard RTMP port.on_publish: a push must pass this auth endpoint first, otherwise the push is rejected.dvr_plan session: one push produces one FLV file, flushed to disk automatically when it ends.dvr_wait_keyframe on: recording starts from a keyframe, avoiding a garbled first frame.
2.2 The Equivalent NGINX-RTMP Configuration
If you’re more familiar with NGINX-RTMP, you can configure it like this:
|
Functionally equivalent: auth hook, FLV recording, unique file names. Here SRS and NGINX-RTMP differ only in implementation — at the protocol level both are standard RTMP.
3. Push Authentication: Preventing Malicious Stream Hijacking
The auth endpoint http://127.0.0.1:8085/api/v1/publish_auth is provided by a Go service (blog_api). It validates the auth_key parameter in the URL, following Alibaba Cloud Live’s URL authentication method A:
|
The Android side generates a signed push URL:
|
This way, even if someone gets hold of the push domain, without the key they can’t forge a valid auth_key.
4. Android Side: Controlling the DJI Action 5 Pro over BLE
This is the most “black box” part of the whole pipeline. DJI hasn’t published the Action 5 Pro’s livestream control protocol, so this part was reimplemented in Kotlin on Android based on the BLE protocol from the MIT-licensed open-source project datagutt/node-osmo.
4.1 Discovery and Connection
When the camera is powered on it advertises over BLE; the first two bytes of the Manufacturer Data are 0x08AA (DJI’s manufacturer ID). After the app scans and finds it, it connects to GATT. The service UUID is 0000fff0-..., and the main characteristics used are fff3 (write commands), fff4 (read/notify), and fff5 (battery notifications).
|
4.2 Pairing
After a successful connection, the camera sends a trigger packet over fff4, and the app replies with a pairing request. The PIN is fixed as love (the value reverse-engineered by node-osmo):
|
4.3 The Go-Live State Machine
After pairing you don’t go live directly — you have to walk through a state machine:
|
The corresponding code:
|
Why STOP_STREAM first? Because the camera remembers its previous livestream state, and going live directly can conflict. Clearing the stage first and then running the complete flow again is the most reliable approach.
4.4 Sending the RTMP Address
|
Currently fixed at 1080P/30fps/6Mbps. After receiving this, the Action 5 Pro doesn’t push immediately — you have to send one more special confirmation frame, which is the STOP_STREAM payload with the last byte changed to 0x01:
|
This confirmation frame is specific to the OA5. Without it, the camera only “pretends” to go live and never actually pushes a stream.
5. A Pure-Code RTMP Client (Fallback)
Besides the camera’s direct push, the app also contains a lightweight RtmpPublisher used for real-time voice streaming, with no third-party library dependency:
|
It implements the RTMP handshake, the connect/createStream/publish commands, AMF0 encoding and decoding, and chunked FLV tag sending all by itself. This class is meant for voice livestreaming rather than Action 5 Pro video, but the protocol implementation itself is generic.
6. Real-Time HUD Overlay: Burning Heart Rate / Speed / Pace into the Video
Once the push succeeds, the next step is overlaying workout data on the video. My approach: the camera pushes the raw stream to SRS, SRS triggers a Python script via exec_publish, and that script uses FFmpeg to pull the stream, apply drawtext overlays, and push it back to SRS under a different stream name.
|
live_stream_hud.py pulls real-time data from blogapi.awen.me/api/v1/gps/track, including heart rate, speed, pace, distance, and duration, then renders it onto the picture with FFmpeg’s drawtext filter. The frontend simply plays STREAM_hud to see the livestream with the HUD.
Adding one exec_publish line to the SRS config triggers it automatically:
|
7. Pitfall Log
The BLE MTU must be negotiated
Some DJI command packets exceed 20 bytes; the default MTU of 23 truncates notifications and causes parsing failures. After connecting, callrequestMtu(512)first.The Action 5 Pro needs the confirmation frame
After sendingSTART_STREAM, you must also send aconfirmStartStreamingPayload(), or the camera won’t actually push.Always STOP before START
The camera remembers its last livestream state, so going live directly fails more often than not. Clear the stage before every go-live.The Wi-Fi scanning permission trap
On Android 13+, scanning Wi-Fi requiresNEARBY_WIFI_DEVICES, but triggering the scan and reading the results additionally requireCHANGE_WIFI_STATEandACCESS_WIFI_STATErespectively. All three permissions must be declared in the manifest.SRS’s auth hook only applies to RTMP
If the HLS playback URL also needs protection, you have to add referer or token validation separately — don’t expect the sameon_publishto cover it.
8. Summary
This solution is very low cost: one Alibaba Cloud ECS running SRS, plus a self-implemented Android BLE control layer, and you can turn a DJI Action 5 Pro into a cycling livestream camera. There’s still room to optimize:
- Move HUD rendering from server-side FFmpeg down to the camera (if DJI ever opens the interface).
- Replace RTMP with WebRTC to cut livestream latency further.
- Automatically convert locally recorded FLV to MP4 and upload it to OSS, achieving “replay available the moment the livestream ends.”
Right now the pipeline runs stably: app configures Wi-Fi → BLE connects to the camera → RTMP address sent → camera pushes directly → SRS receives and records → FFmpeg overlays the HUD → frontend plays. For a one-person project, that’s enough.
评论
0 条评论