上一篇把 ESP32 连上 WiFi 和蓝牙之后,接下来想接点传感器玩玩。先从最常见的温度传感器 DS18B20 开始,它的优点是数字输出、一根总线可以挂多个设备、精度也还不错。
1. 所需材料
- ESP32 开发板一块
- DS18B20 温度传感器模块(或裸传感器)
- 4.7kΩ 电阻一个(上拉用)
- 杜邦线若干
2. 接线方式
DS18B20 是三脚封装,接线如下:
| DS18B20 |
ESP32 |
| VCC |
3.3V |
| GND |
GND |
| DATA |
GPIO13 |
注意:DATA 和 3.3V 之间必须接一个 4.7kΩ 上拉电阻,否则 OneWire 总线不稳定,经常读不到设备。
        4.7kΩ
3.3V ───\/\/\/───┬──── DATA (GPIO13)
                │
DS18B20        ─┴────
VCC ──────────────── 3.3V
GND ──────────────── GND
|
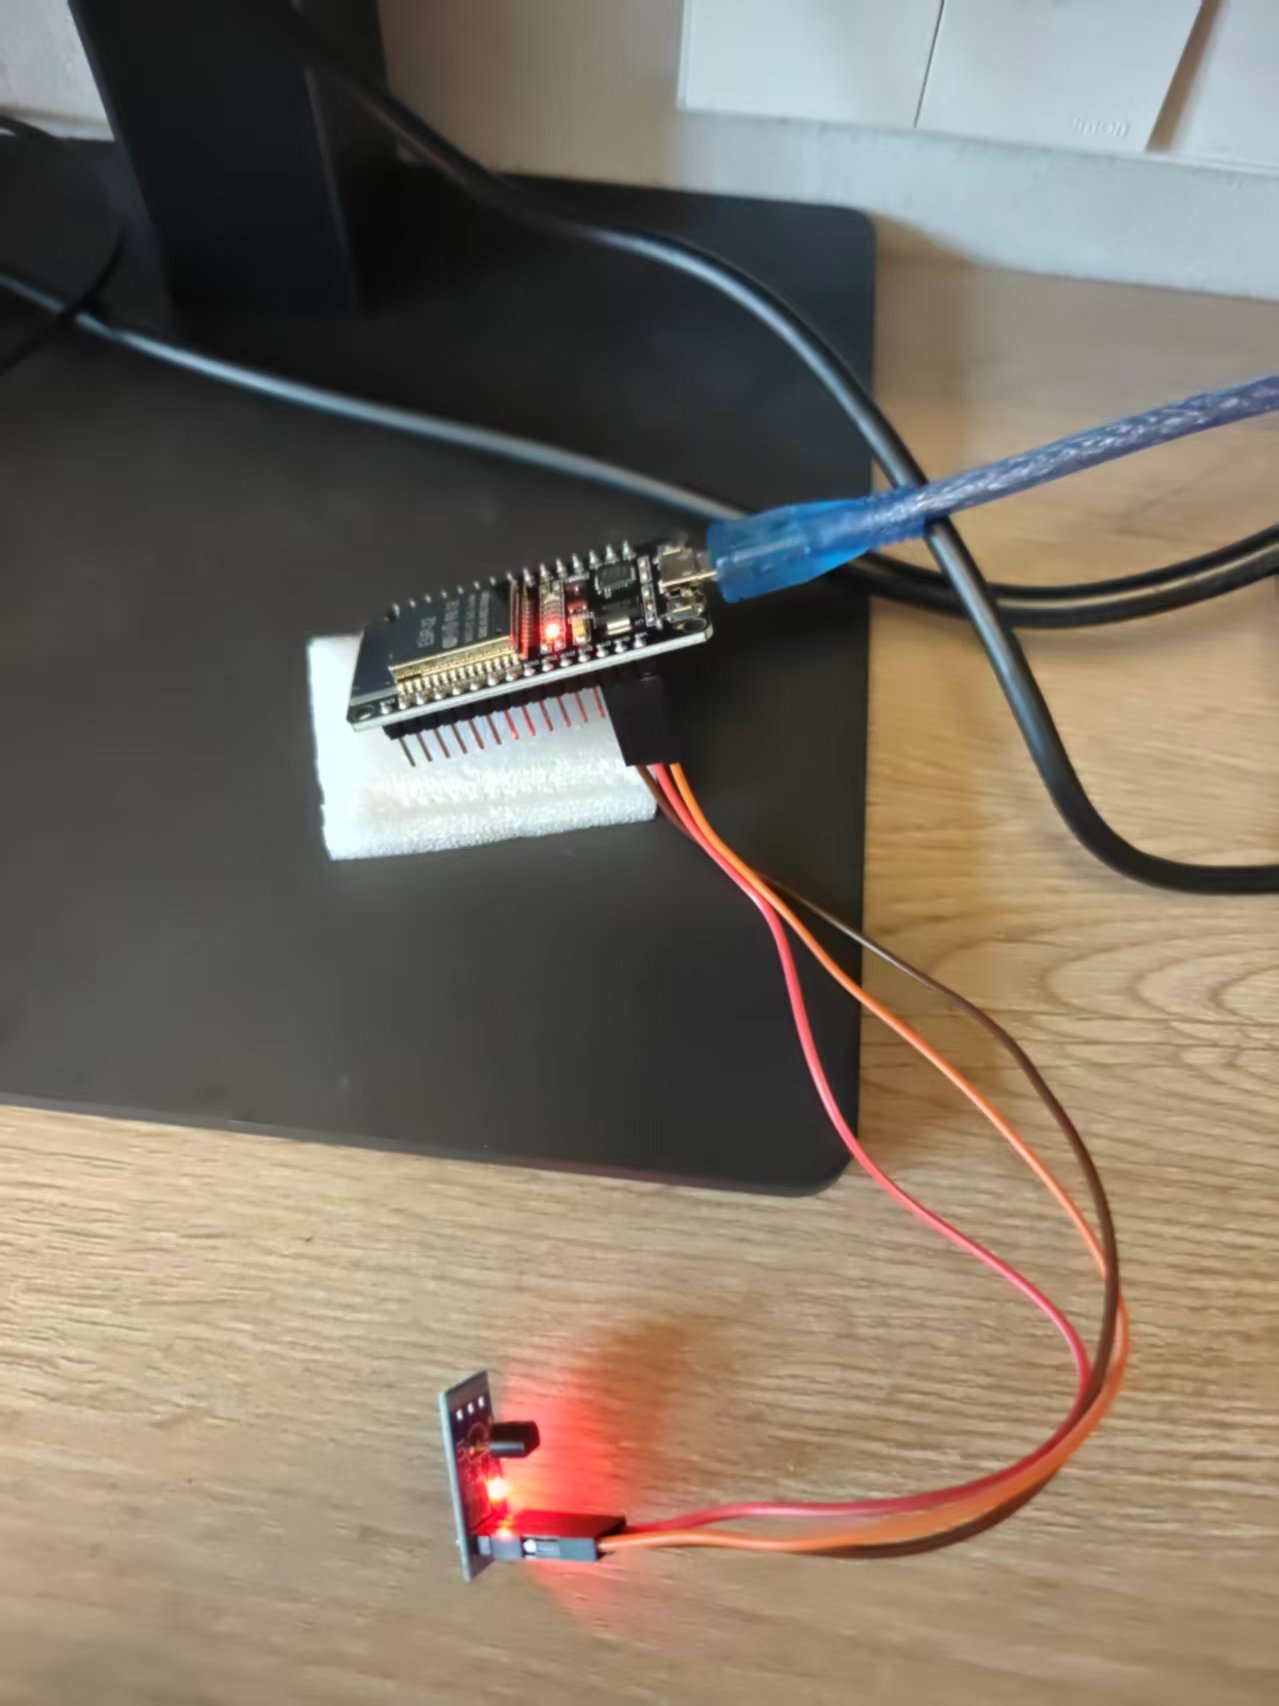
实际接线照片:
3. 读取温度代码
MicroPython 自带 onewire 和 ds18x20 模块,不需要额外安装。
from machine import Pin
import onewire
import ds18x20
import time
ds_pin = Pin(13)
ds_sensor = ds18x20.DS18X20(onewire.OneWire(ds_pin))
def read_temperature():
roms = ds_sensor.scan()
if not roms:
print('未检测到 DS18B20 设备,请检查接线')
return None
ds_sensor.convert_temp()
time.sleep_ms(750)
temps = []
for rom in roms:
temp = ds_sensor.read_temp(rom)
if isinstance(temp, float):
temps.append(round(temp, 2))
return temps
while True:
temps = read_temperature()
if temps:
print('当前温度:', temps, '°C')
time.sleep(1)
|
代码说明:
scan() 扫描 OneWire 总线上的设备,返回每个设备的 64 位 ROM 地址。convert_temp() 向所有设备发送温度转换命令。- DS18B20 默认 12 位精度转换时间约 750ms,所以必须
sleep_ms(750)。
read_temp(rom) 读取指定设备的温度。
4. 识别传感器型号
运行下面命令可以读取 ROM 地址和家族码:
from machine import Pin
import onewire, ds18x20, binascii

ow = onewire.OneWire(Pin(13))
ds = ds18x20.DS18X20(ow)
roms = ds.scan()
for rom in roms:
    print('ROM:', binascii.hexlify(rom), 'Family:', hex(rom[0]))
|
我手上这颗输出:
ROM: b'2824bb020002249f' Family: 0x28
|
家族码 0x28 就是 DS18B20。如果是 0x10 则是老款的 DS18S20。
5. 实际读数
串口输出:
当前温度: [32.19] °C
当前温度: [32.19] °C
当前温度: [32.12] °C
|
实际拍摄的温度计读数:
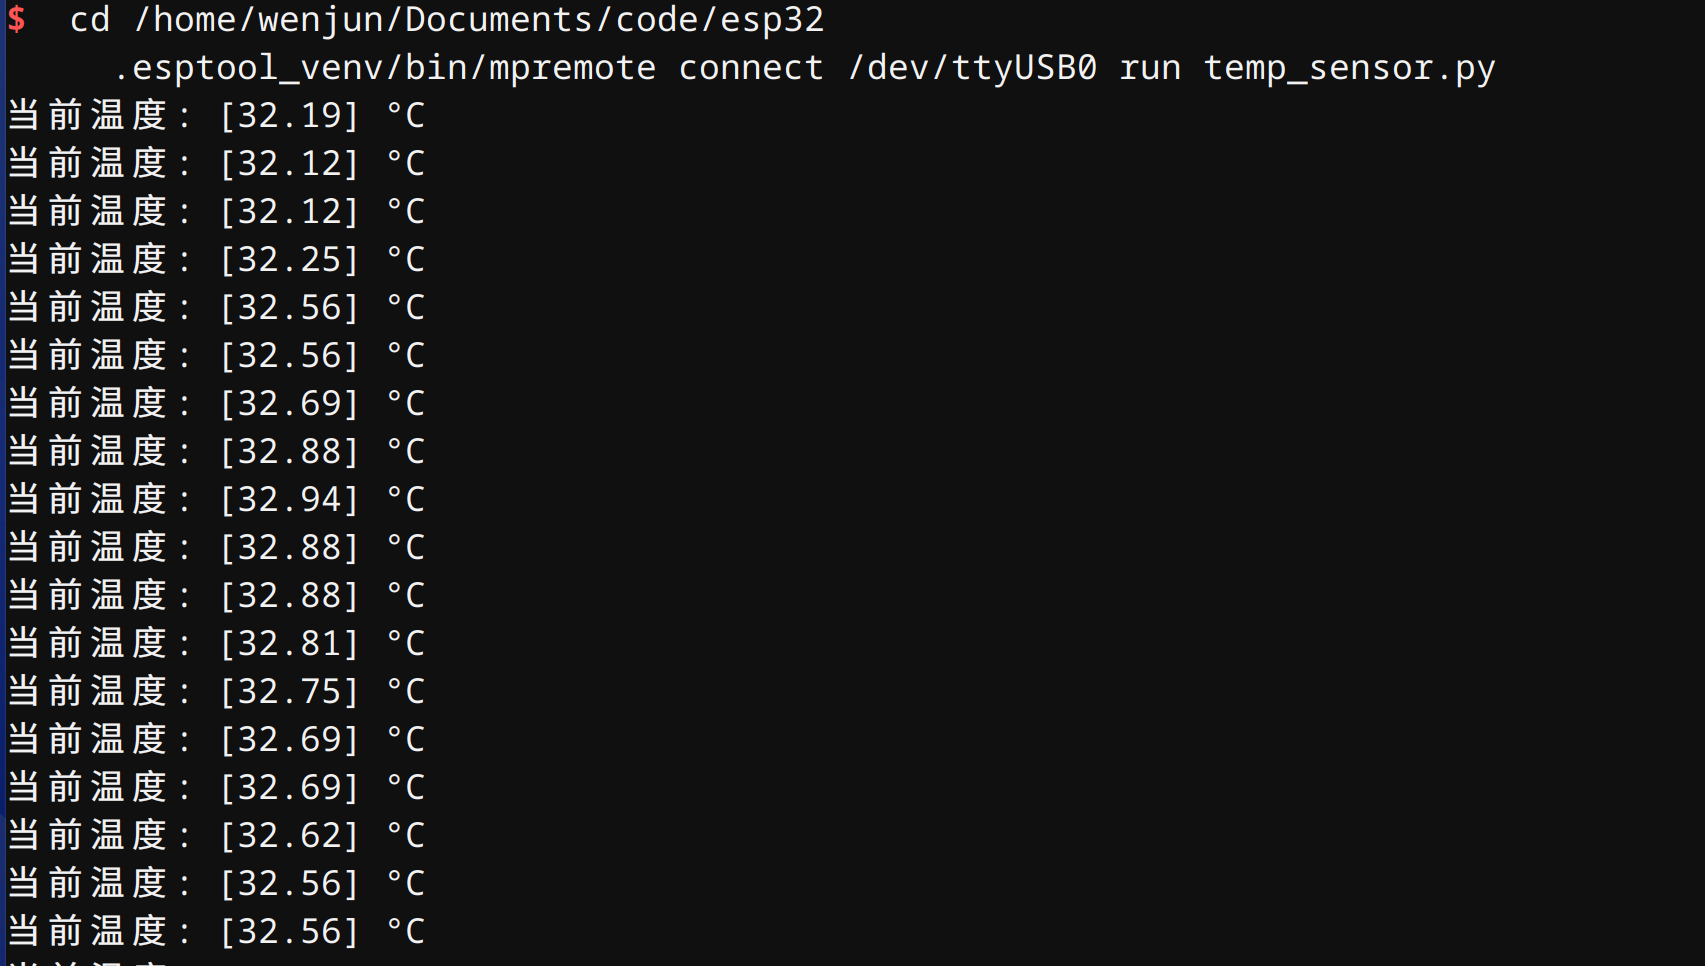
这个温度是室温加手指捏着传感器的余温,所以比正常室温偏高一点。
6. 常见问题
- 读不到设备:先检查上拉电阻有没有接,杜邦线有没有插紧。
- 温度偶尔跳 85°C:这是 DS18B20 的上电复位默认值,通常是因为读取时转换还没完成,把
sleep_ms 时间加长到 1000ms。
- 多个传感器:
scan() 会返回多个 ROM,convert_temp() 一次触发全部设备,然后逐个 read_temp(rom) 即可。
7. 实时上传到博客数据库
blog-api 已经提供了温度写入接口,不需要再写后端代码。接口信息:
- 写入:
POST https://your-api-domain.com/api/v1/temperature/realtime
- 认证:Header
Authorization: Bearer sk_xxx
- 请求体:
{
  "value": 26.56,
  "timestamp": 1723968000000,
  "device_id": "2824bb020002249f",
  "source": "esp32-ds18b20"
}
|
7.1 创建 API Token
登录 blog-api 管理后台,创建一个 write 权限的 API Token,或者直接用 curl:
curl -X POST https://your-api-domain.com/api/v1/admin/api-tokens \
  -H "Authorization: Bearer <你的JWT>" \
  -H "Content-Type: application/json" \
  -d '{"name":"ESP32温度上传","permissions":"write"}'
|
把返回的 sk_xxx 填到 api_config.py:
API_BASE_URL = 'https://your-api-domain.com'
API_TOKEN = 'sk_你的Token'
UPLOAD_INTERVAL_MS = 300000
|
7.2 上传脚本
temp_uploader.py 核心逻辑:
import network
import time
import urequests
import ujson
import ntptime
from machine import Pin
import onewire
import ds18x20
from wifi_config import SSID, PASSWORD
from api_config import API_BASE_URL, API_TOKEN, UPLOAD_INTERVAL_MS
DS_PIN = 13
def connect_wifi():
wlan = network.WLAN(network.STA_IF)
wlan.active(True)
if not wlan.isconnected():
wlan.connect(SSID, PASSWORD)
while not wlan.isconnected():
pass
print('IP:', wlan.ifconfig()[0])
def sync_ntp():
try:
ntptime.settime()
print('NTP synced')
except Exception as e:
print('NTP sync failed:', e)
def read_temperature():
ds_sensor = ds18x20.DS18X20(onewire.OneWire(Pin(DS_PIN)))
roms = ds_sensor.scan()
if not roms:
return None, None
ds_sensor.convert_temp()
time.sleep_ms(750)
rom = roms[0]
temp = ds_sensor.read_temp(rom)
rom_hex = ''.join('{:02x}'.format(b) for b in rom)
return round(temp, 2), rom_hex
def upload_temperature(value, device_id):
url = API_BASE_URL + '/api/v1/temperature/realtime'
headers = {
'Authorization': 'Bearer ' + API_TOKEN,
'Content-Type': 'application/json',
}
unix_timestamp_ms = (time.time() + 946684800) * 1000
payload = {
'value': value,
'timestamp': unix_timestamp_ms,
'device_id': device_id,
'source': 'esp32-ds18b20',
}
response = urequests.post(url, headers=headers, data=ujson.dumps(payload), timeout=15)
status = response.status_code
response.close()
return 200 <= status < 300
def main():
connect_wifi()
sync_ntp()
while True:
temp, rom = read_temperature()
if temp is not None:
print('Temperature:', temp, '°C')
upload_temperature(temp, rom)
time.sleep_ms(UPLOAD_INTERVAL_MS)
main()
|
运行后 ESP32 会每 5 分钟读取一次温度并上传到 blog-api 的 realtime_temperature_records 表。
7.3 验证数据
公开查询接口:
curl "https://your-api-domain.com/api/v1/public/temperature/realtime?user_id=1"
curl "https://your-api-domain.com/api/v1/public/temperature/history?user_id=1&days=7"
|
把 user_id 换成你的实际用户 ID 即可。
8. 效果展示
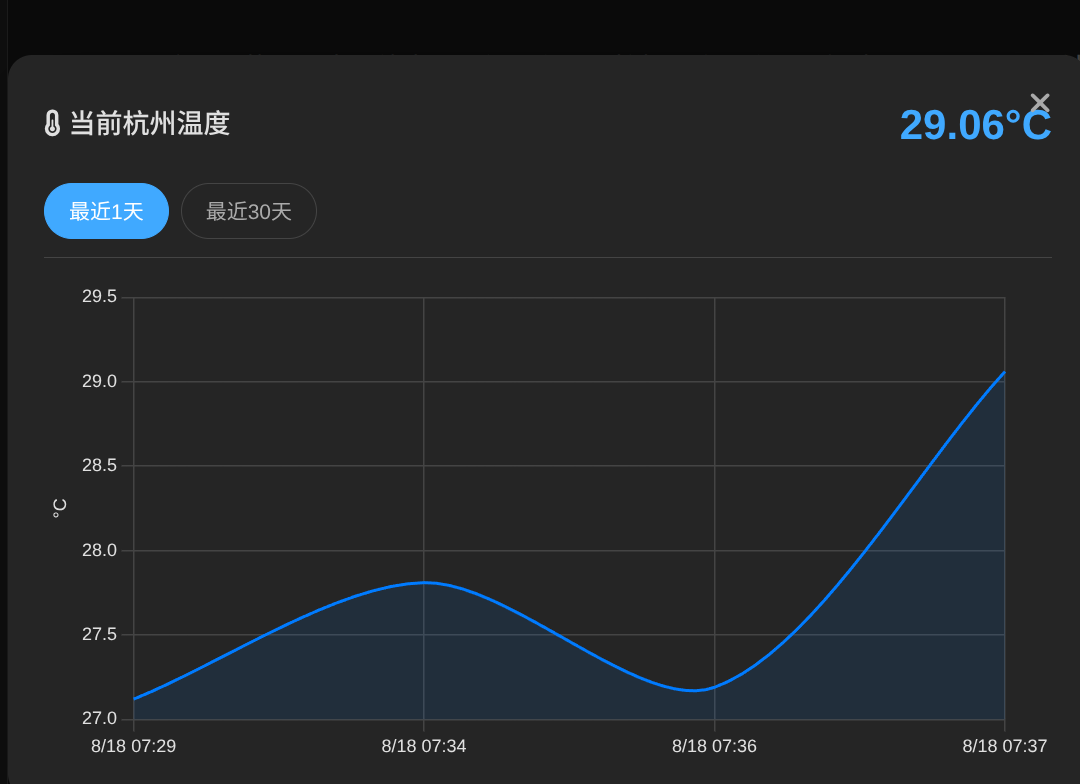
数据上传后,我在博客首页加了一个「当前杭州温度」组件,点击温度会弹出最近 1 天和最近 30 天的温度趋势图。下面这张图就是今早刚截的实时效果:
9. 视频演示
下面是这次折腾过程的视频演示:
10. 下一步
可以在博客前端加一个温度卡片,调用 /api/v1/public/temperature/realtime 展示当前环境温度。再加一个折线图调用 /history 展示 24 小时趋势,就是一个完整的无线温度计看板了。
评论
0 条评论