If you copy and paste dozens of times a day between a browser, an IDE, documents, and chat windows, you’ll understand one thing: the clipboard is the most-used productivity tool there is. And yet it’s the most ignored one — by default the system remembers only the last item, and the moment your hand slips and copies something new, that passage of text from a minute ago can never be found again.
At first I used Paste for seven or eight years, paying a 98-yuan annual subscription. I looked at the pricing on the official site and the buyout is even more outrageous: https://pasteapp.io/pricing — 89.99 US dollars.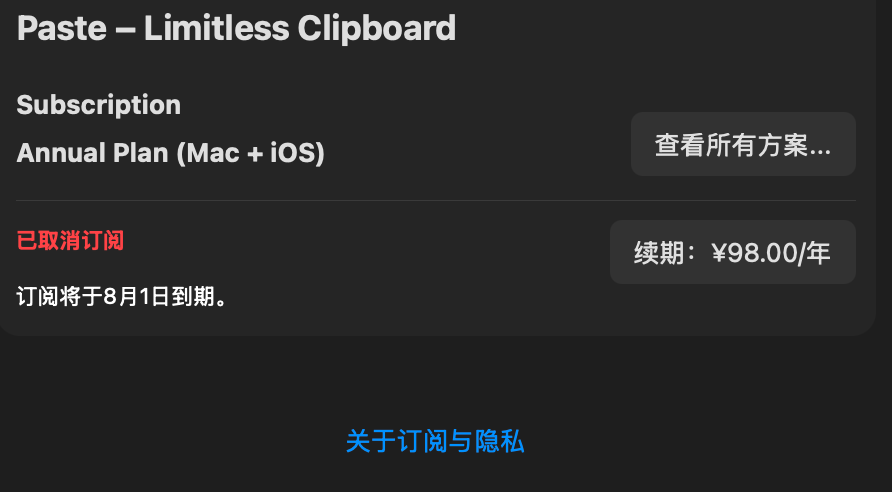
I’d previously written a clipboard tool in Rust and had been using it on Windows all along. It had all the basic functions, but the more I used it the more constrained it felt: I wanted smoother UI animation, drag interactions that tracked the hand better, and deeper system integration, and on Windows there were too many detours.
Later I moved to macOS as my primary environment and simply rewrote it in Swift, with Kimi K3 assisting throughout. What I found was that Swift + AppKit/SwiftUI can produce a great many effects that were hard to achieve in the Rust version — for example dragging files straight into the panel to save them, more precise global hotkeys, and native integration with the system Keychain and iCloud.
The new version is still called ClipVault, but it’s now a version rebuilt from zero and redesigned for macOS.
Video Demo
The video below documents the complete process: from requirements gathering and interface design through writing the Swift code to the final product, with Kimi K3 assisting throughout.
What It Solves Isn’t “Whether You Can Find It,” but “Whether Finding It Feels Good”
A clipboard tool has exactly one core job: things you once copied can be found again quickly right now. But those two words — “quickly” — contain a lot of detail.
ClipVault’s interaction revolves entirely around a bottom panel. Press ⇧⌘V and the panel slides out from the bottom of the screen, with recently copied content arranged horizontally as cards. You don’t need to leave your current window, you don’t need to open a full application, your eyes barely move, and your fingers never leave the keyboard.
- Left and right arrows to switch the selection
- Enter to paste directly
⌘1through⌘9to paste any of the first 9 items with one keystroke⌥⌘Fto expand the search box and filter instantly as you type keywords
All of these shortcuts can be changed yourself in settings. For me the ideal state is “muscle memory replacing the mouse,” so every high-frequency operation has a keyboard entry point.
Not Just History, but Your Fragments of Knowledge
The kinds of content you copy are extremely varied: a URL, a color value, a screenshot, a few lines of an error log, a sentence of inspiration that struck you out of nowhere.
ClipVault identifies the type automatically: links show the website favicon, hex colors render directly as a color swatch, images show a thumbnail, and text shows a character count. That way you don’t have to open the card — one glance tells you whether it’s the one you’re looking for.
But history entries will eventually get cleared. The things that genuinely need to be kept long term, I drag into a “collection” (Pinboard). Collections are like little drawers: frequently used code snippets, design references, writing material, links to read later… Each collection can be named and given a different color, and double-clicking renames it. Content placed in a collection is kept permanently and is unaffected by the automatic cleanup policy.
From “temporary copy” to “deliberate keeping” — that boundary matters. History is running water; collections are a bookshelf.
What Swift Brings: Dragging Files Straight Into the Panel
This is the thing I most regretted about the Rust version: on Windows, to get file drag-and-drop into a window you either depend on a third-party framework or handle a huge amount of COM and window messages yourself, and the experience always ends up stiff no matter what you do. On macOS, SwiftUI/AppKit has native drag-and-drop support, and a few lines of code let the panel accept file drags.
In ClipVault you can drag a file straight from Finder into the panel, and it becomes a file-type clipboard entry showing the filename, icon, and path. When you need it, press Enter or ⌘1 to write it back to the clipboard and then paste it into a chat window, an email, or the command line.
This capability looks small but feels very smooth in use: image assets, PDFs, config files, scripts… one drag stashes it, with no need to open a file manager or a cloud drive specifically.
Search and Filtering Are the Clipboard’s Second Brain
Once history runs past a few hundred entries, scrolling stops finding anything. ClipVault’s search box supports global search, covering history and all collections at once. Results update instantly as you type, and a 150ms debounce keeps frequent typing from stuttering.
If all you remember is “it was roughly an image,” “I copied it from WeChat,” or “it was some color,” you can also use filter bubbles to narrow further by type, source application, or collection. This kind of combined query is extremely efficient in daily use:
“Find that blue color value I copied from the browser yesterday” — type
blue+ filter by “color” + look at the relative time, and you’ve basically located it in a second.
The Data Stays Local; the Encryption Is a Door I Set for Myself
This may be where ClipVault differs most from most clipboard tools: all data stays only on this machine by default.
History, collections, and images are all encrypted before being written to disk, with the key kept in the system Keychain. Even if someone gets hold of your computer’s disk files, they can’t read the content directly. Sync also goes through iCloud Drive, but the files in the sync directory are encrypted as well.
I could of course upload the data to some server to achieve cross-device sync, but the clipboard scenario is far too sensitive. It may contain tokens, ID numbers, internal links, and private conversations. Local-first plus end-to-end encryption is the minimum standard I can accept.
In addition, ClipVault actively ignores two kinds of content:
- Content marked “confidential” by a password manager
- Content marked “transient” by an application
What shouldn’t be recorded, it won’t record.
Some Thoughtful Little Design Details
- Pause recording: if you temporarily need to copy something sensitive, you can pause for anywhere from 5 minutes to 1 day, resuming automatically when the time is up.
- Paste method is your choice: it can simulate
⌘Vand paste directly into the current app, or it can only write back to the clipboard and let you decide. - Create a new text item: sometimes a sentence pops into your head — press a shortcut and you can write a plain-text entry, with simple formatting supported.
- Lives in the menu bar: left click summons the panel, right click goes to settings or quits.
- Launch at login: starts with your Mac and waits quietly in the background.
- Panel position is selectable: bottom, top, left, right — and the left and right sides automatically switch to a vertical layout.
- Appearance and language: follow the system or set light/dark mode separately; Simplified Chinese and English are supported.
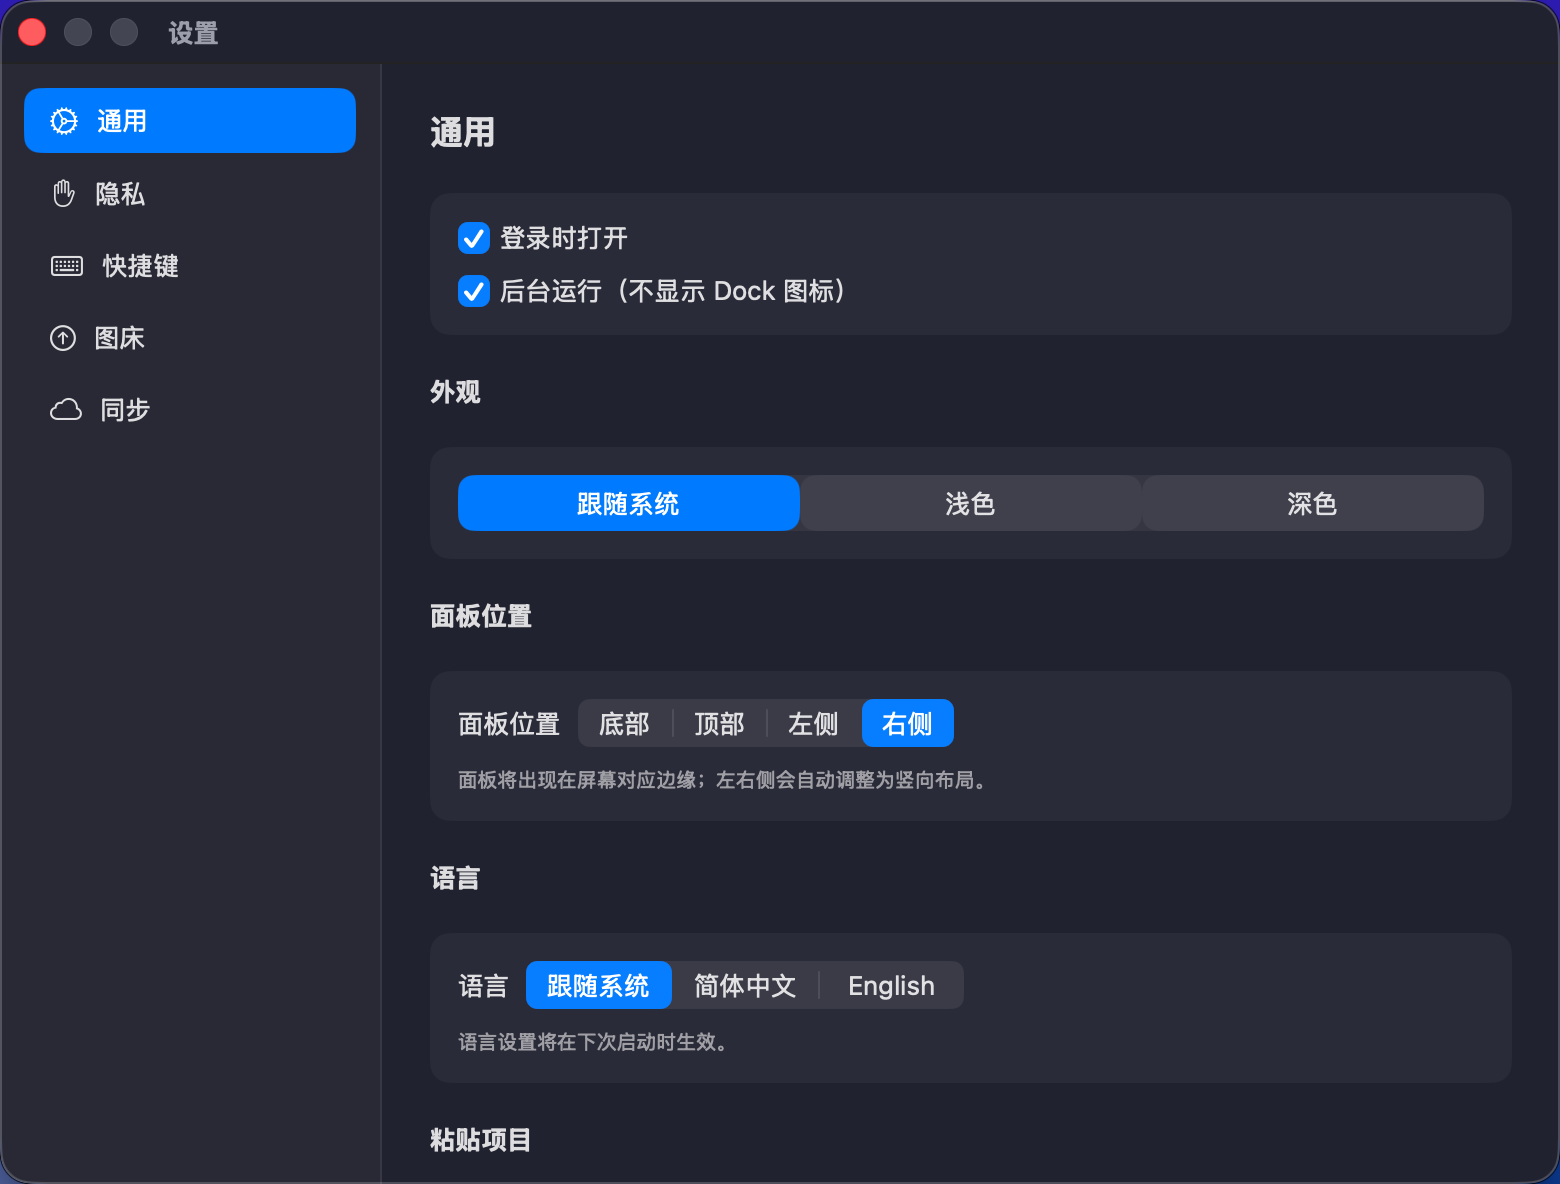
All of these settings are in the same window, switched from the left sidebar — no digging around.
From Rust to Swift: Why I Decided to Rewrite
ClipVault isn’t appearing for the first time. I’d written a version in Rust before and used it on Windows for quite a while, and the core logic had actually been thought through long ago: local storage, card history, fast search, collections for keeping things.
But after moving to macOS I found that many parts of the experience could only be compromised in the original version: no native system Keychain integration, dragging files into the window was awkward, and the UI animation and panel behavior were hard to make feel “like a native app.” So I decided to rewrite it completely in Swift for macOS — partly because performance would be good enough, and partly because I could call deeply into NSPasteboard, global hotkeys, the Keychain, and iCloud Drive.
Kimi K3 Was the “Pair Programmer” for This Rewrite
I used Kimi K3 for almost the entire development process. It helped me generate, debug, and refactor a large amount of Swift code, and especially when dealing with macOS-specific APIs like NSPasteboard, bottom-panel animation, and global hotkeys, K3’s long context and code comprehension saved a lot of time.
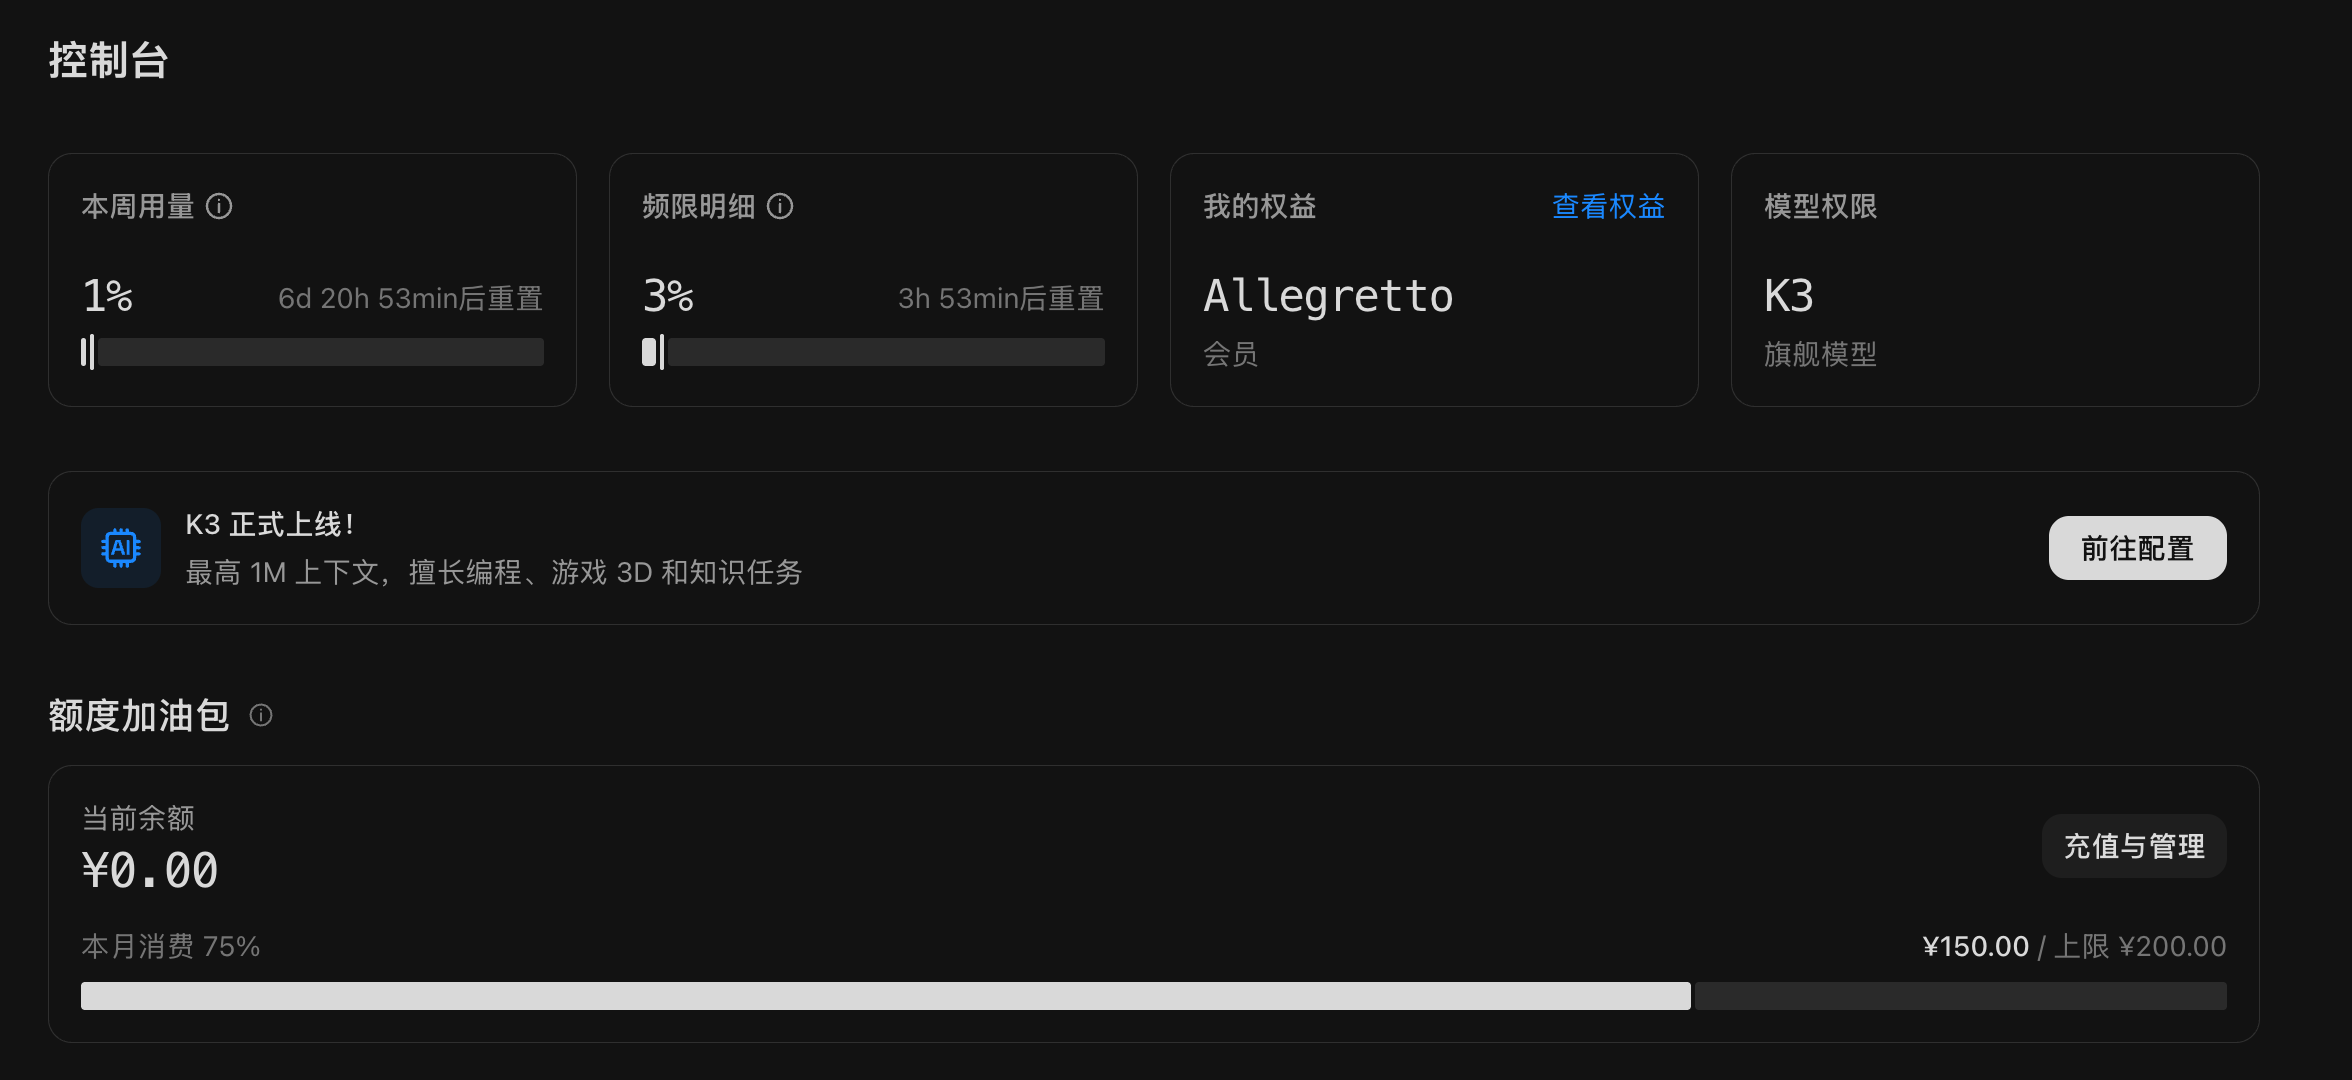
The image above is a screenshot from my Kimi backend. K3 is officially live and supports up to 1M context. For a desktop application like this one, which requires repeatedly polishing UI details and system interaction, being able to throw an entire SwiftUI view’s code and event-handling logic in at once and discuss it produces a very noticeable efficiency gain.
Below is ClipVault’s actual interface:

This is the bottom panel right after installation, when there’s no history yet. The “Clipboard / Images / Files” tabs at the top are the collection entry points, and search and filtering expand here on the right. The whole panel has no complicated window frame — summoning and dismissing it are both very light.
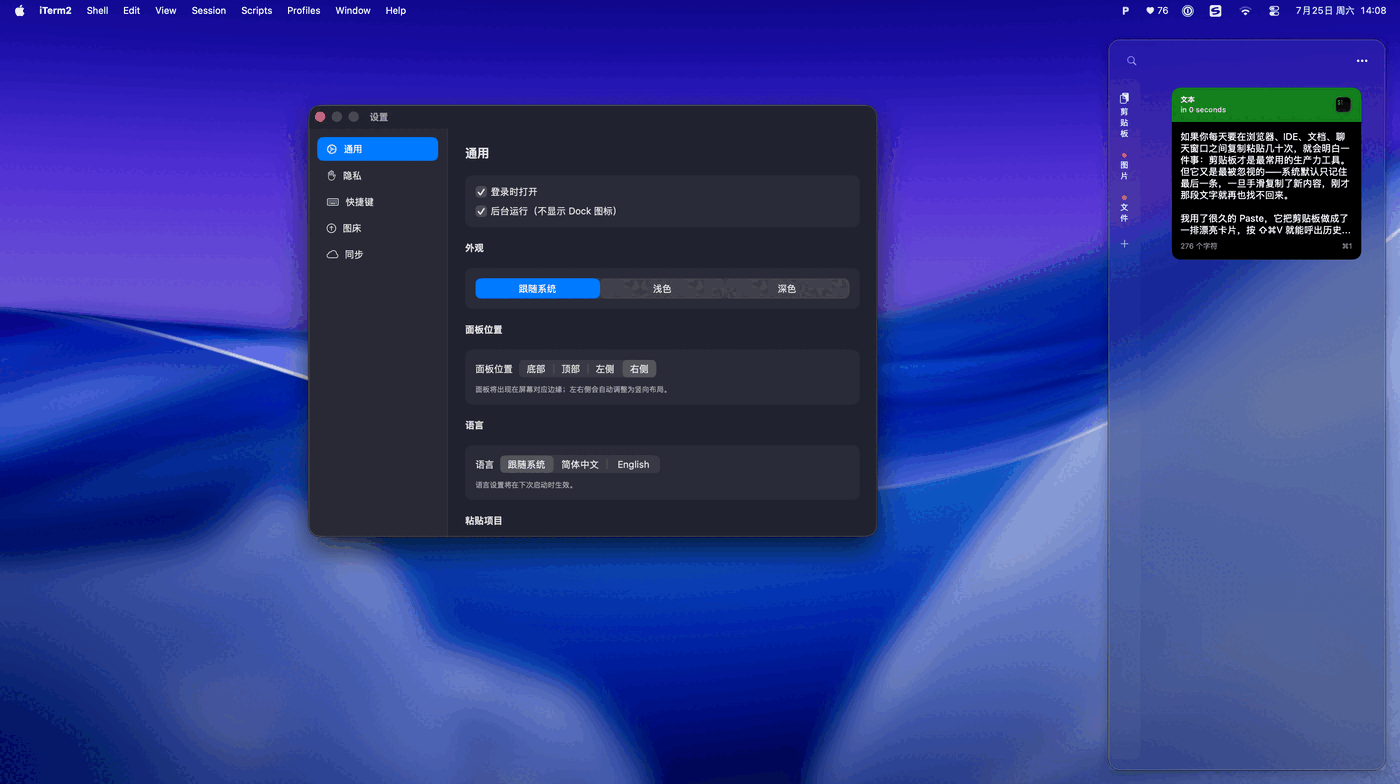
In actual use the panel can be docked on the right side of the screen (you can also choose bottom, top, or left). In the image above I copied the blog body I’d just written into it; ClipVault automatically identified it as text type, showing the source app and the character count, and pressing ⌘1 pastes it straight back.
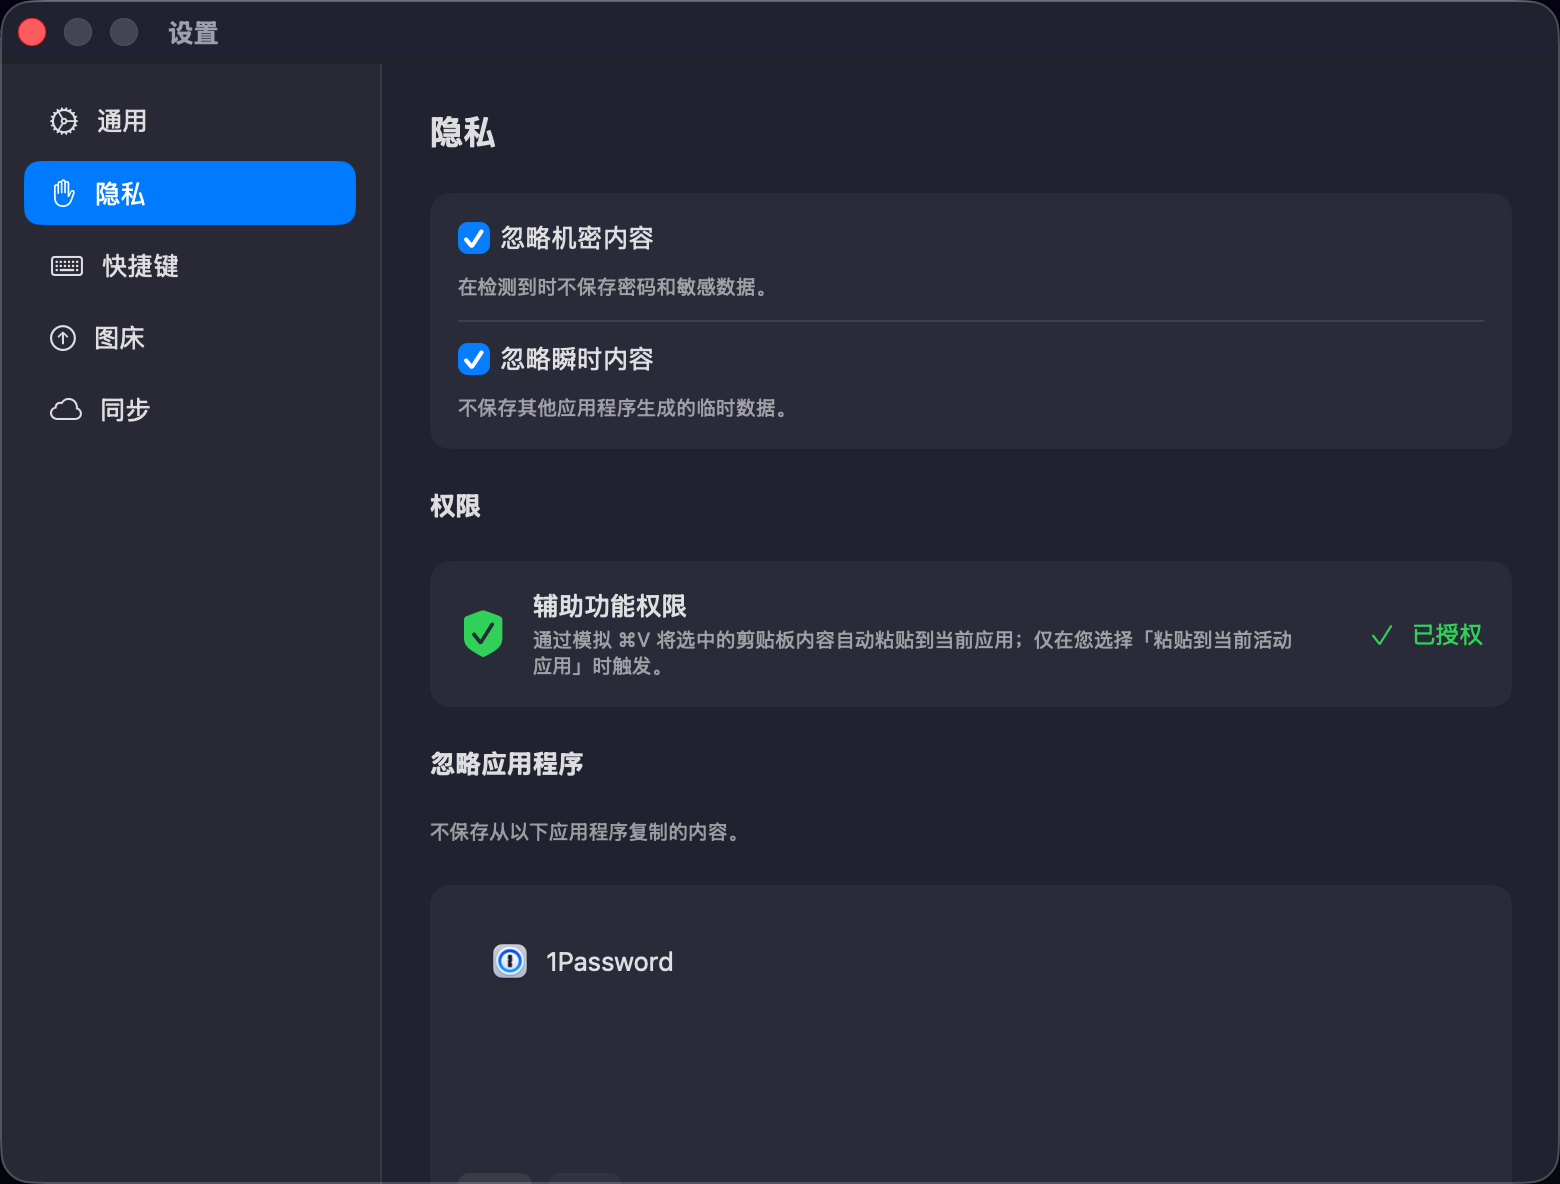
The privacy settings page is one of the places I spent the most time on. Here you can turn on “ignore confidential content” and “ignore transient content,” and you can also add password managers like 1Password to the list of ignored apps. Accessibility permission is granted on demand; when it isn’t, ClipVault only writes content back to the clipboard and won’t paste it for you automatically.
Writing a macOS app in Swift with Kimi K3 assisting — that combination let me get a prototype running in one weekend, then spend another one or two evenings polishing the details to a level fit for daily use. If you’ve also had a “why not just build one myself” thought, the toolchain today really is good enough.
Final Words
ClipVault isn’t a big, do-everything tool. It just takes the small matter of “copy and paste” as far as the point where I feel comfortable: fast response, no network, searchable, able to keep things, able to encrypt.
Right now it only supports macOS 14 and above. If you’re also sick of subscription-based clipboard tools, or you just want to find a genuinely local alternative, give it a try.
Download: ClipVault-Swift v1.1.0 Release — issues and PRs welcome.
评论
0 条评论